Using draftpool
What each action does, how long it takes, and how to get good results. Installation is in Setup. Edge cases and workarounds are in Deep dive.
Making drafts
- Type what you want to see in the prompt box, in your own words.
- Pick one or more models from the chips above the prompt, and a shape.
- Enrich prompt has the LLM write several prompt variants from your words (3 by default), which you can edit or drop. Skip it and your prompt is sent as written. From image… starts from a picture instead: a vision LLM describes it, and your text steers what it focuses on.
- Generate drafts renders every prompt on every selected model, with seeds each different seeds (2 by default).
Every model gets the same ideas, with the anime models getting them in their own tag wording, so a round also shows you which model suits the subject. Drafts are small and quick; take the ones you like further with the actions below.
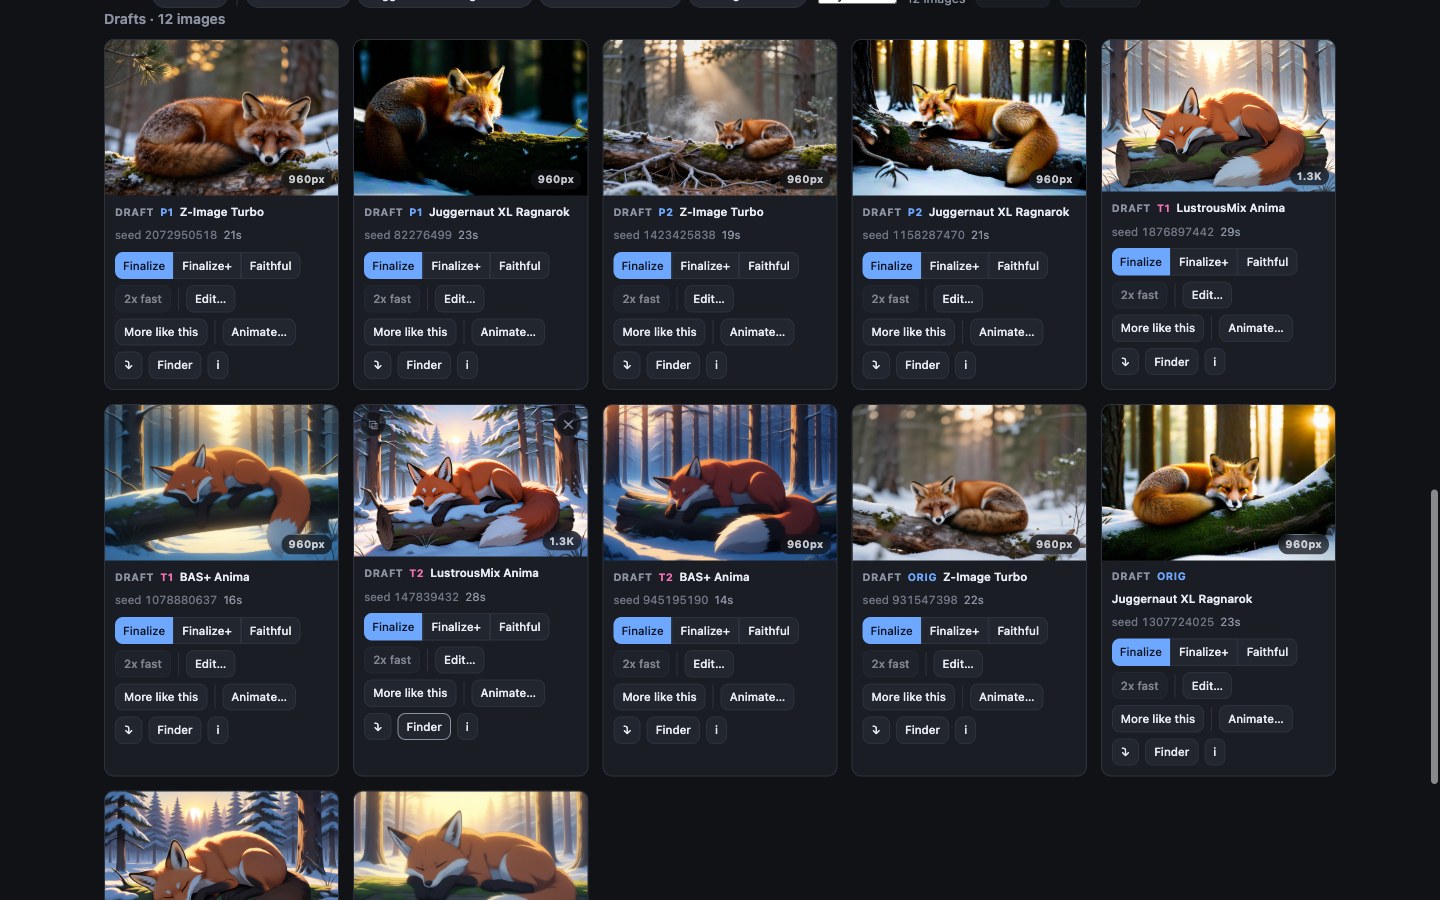
What each action does
On a draft or finished image:
- Finalize: renders the image again at the model's full size (1024–1536px) with the same prompt, seed and model. Finalize+ first has the LLM look at the draft and adds what it sees to the prompt.
- Faithful: enlarges the draft to full size and repaints it, keeping the composition exactly. A plain Finalize with the same seed gives a similar picture, not the same one.
- More like this: same prompt, new seeds.
- Edit…: change part of the picture, or all of it. See Edit.
- Combine…: put the subject of one picture into the scene of another. See Combine.
- Fix faces: finds the faces and repaints them in more detail, leaving the rest of the image untouched.
- Upscale: enlarges to 2K, 3K or 4K and adds new detail. See Upscale.
- 2x fast: doubles the size in seconds, sharpening what is already there without adding anything.
- Animate…: turns the image into a short video clip. See Animate.
- Publish…: posts the image to Civitai as a private draft. Not available on drafts. See Publish.
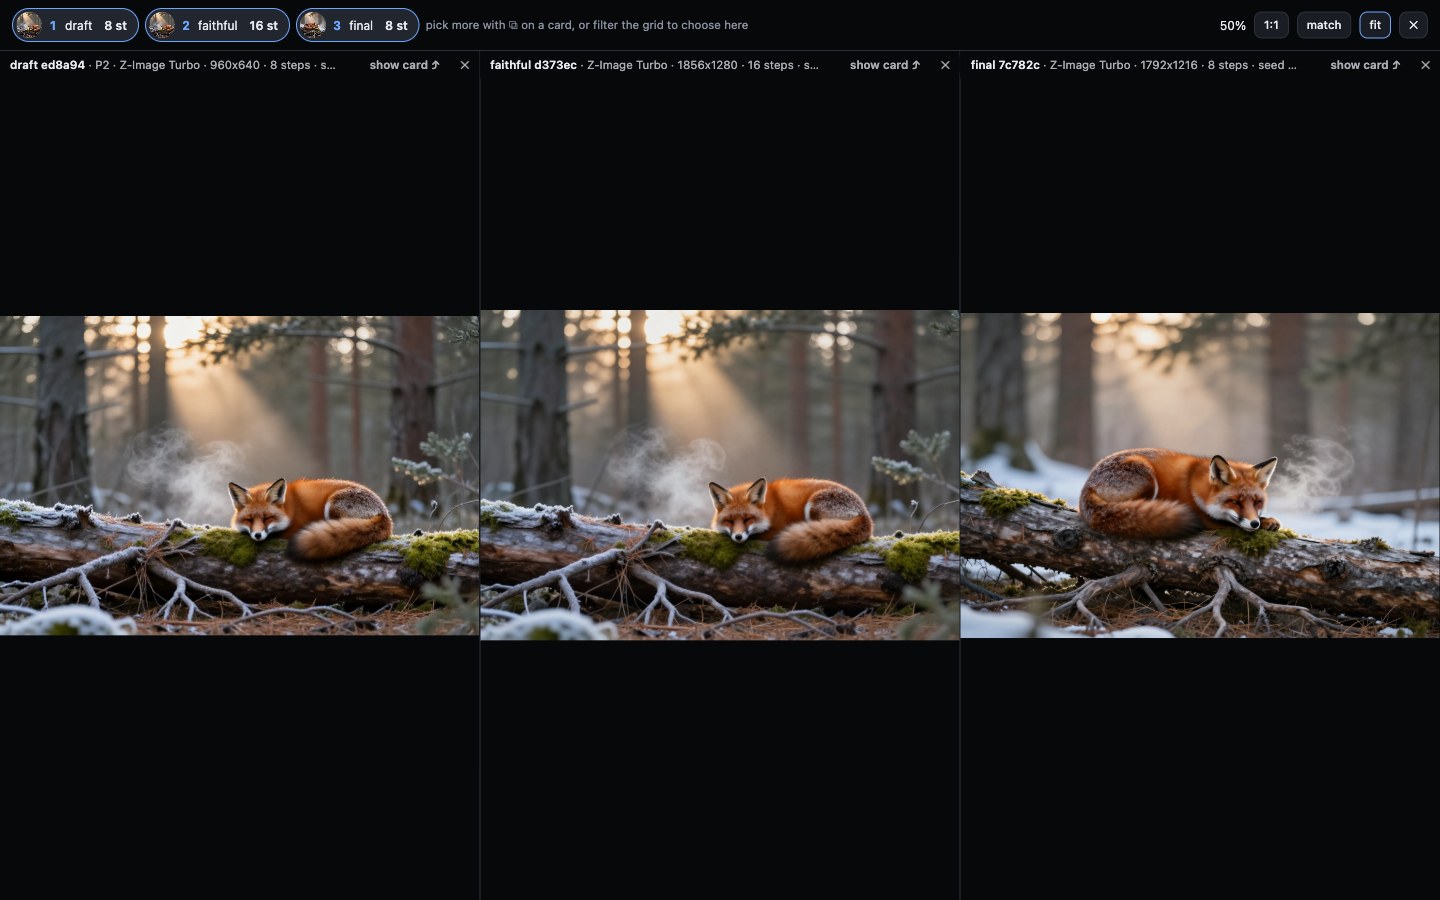
Left to right: a draft, its Faithful and its Finalize. The Faithful is the draft at full size; the Finalize is a new picture from the same seed, here with the fox facing the other way.
How long things take
Everything runs on your own Mac, so nothing is instant. These are typical times on a MacBook Pro M4 Pro with 48GB:
| action | typical time | notes |
|---|---|---|
| 2x fast | 4s | the only thing that feels instant |
| draft | 15s–1 min | depends on the model; about 2 min on Qwen Image |
| Edit, rectangle, change something | 30s | only the rectangle is rendered |
| Fix faces | 30s–1 min | |
| Edit, rectangle, add something | 1.5 min | |
| Edit, no rectangle | 1–1.5 min | |
| Faithful | 2 min | |
| Combine | 2 min | |
| Finalize | 2.5 min | |
| Upscale to 2K | 3 min | 3K and 4K take longer |
| Finalize+ | 3–4 min | the LLM reads the image first |
| Animate | 6–12 min | for a 2-second clip, MiniMax H3 to FusionX |
A round of 4 prompts × 2 models × 2 seeds is 16 drafts, so expect several minutes before you have anything to choose from. Draw Things renders one image at a time, and results appear as they finish.
After a model has rendered a few images at a given size, the app knows how long it takes on your Mac. The count beside Generate then shows the wait for the whole round, the model chips show each model's draft and final times, and the Finalize, Faithful and Upscale buttons say how long they will take. A + after a time means some of the selected models haven't been timed yet; hover it to see which.
Choosing which models you see
The ⚙ button in the header opens Models, which lists every model with a tick box. Untick one to hide it from the model chips and pickers. Images you already made with it keep all their buttons.
Hide models that aren't installed in Draw Things hides the greyed-out chips automatically. A model you install later appears by itself.
A checkpoint you import into Draw Things yourself shows up after a page refresh, set up for its kind of model. Its Civitai column then has a field: paste the version id, the AIR or the SHA256 from the model's Civitai page and press Set. That credits the model when you publish, and corrects its settings when they were guessed wrong; the message says which it did.
Steps
Steps are how many passes the model makes over an image. More steps take longer and add detail, but only up to a point, and that point is different for each model. Some fast models are designed for 4–8 steps and gain nothing from more; a few get worse.
Each model comes with tested step counts. To change them, open the ⚙ dialog: every model has a draft count and a final count. A changed number shows in blue; reset puts it back.
Lowering draft steps can make your finished images worse. Faithful and Upscale start from the draft, so a rougher draft can show through even when the draft itself looks fine. If your Faithful images start coming out flatter or darker, raise the draft steps again.
Upscale steps can't be changed.
Your changes are saved with your data, not in config/models.yaml, so updates
don't overwrite them.
Speed LoRAs
Some models can use a LoRA that makes them several times faster. These are shown as a ⚡ switch on the model's chip, and as a tick in the LoRA column of the ⚙ dialog. They start switched on. Qwen Edit has no chip, so its Lightning LoRA is switched in the ⚙ dialog only.
| model | LoRA | with it | without it |
|---|---|---|---|
| Qwen Edit (Edit, Combine) | Lightning | ~1.5 min | ~5 min |
| Anima models | Anima Turbo | ~1 min final | ~6 min final |
| Qwen Image 2512 | Turbo | under 1 min final | ~3.5 min final |
What they cost besides speed:
- No negative prompt. These LoRAs run at CFG 1, so the negative prompt box disappears for those models.
- Anima Turbo changes the look: darker and warmer, and on some checkpoints less bright. Turn it off when you want the model's own colours.
- Qwen Image Turbo makes skin look harsher. For a portrait, turn it off.
- Lightning is weak at replacing things (see Edit).
Each image remembers whether the LoRA was on when it was made, and everything made from it follows suit, so changing the switch only affects new drafts.
A LoRA you haven't installed shows greyed out and the model runs without it. Where to get each one is in Setup.
Tuning a model you imported
A checkpoint you import yourself is set up with the settings of its kind (Illustrious, Animagine, Anima or plain SDXL). These are a sound start, but the sampler and cfg that suit one finetune can leave speckle or waxy faces on another. In the ⚙ dialog, such a model has a Tune… button. It renders the alternatives and asks you to pick between them, in short rounds:
- Kind of model (SDXL models only): the same scene prompted as an anime model and as a general one. Draw Things can't tell these apart, and a model prompted as the wrong kind comes out soft. Pick the one that looks right.
- Sampler and cfg: four versions of one picture, shuffled, at full resolution. Pick the cleanest.
- Final size: count the people. A model asked for more pixels than it can compose often draws the figure twice.
- Final steps: the same picture at two step counts. If you can't tell them apart, the faster one is kept. You can skip this round.
It takes about 20–30 renders, so around 15–25 minutes on an SDXL model. The dialog shows the wait. The renders run one at a time beside your own, and you can close the dialog and come back. Nothing changes until you save at the end. A change needs the same pick on both seeds; anything less keeps what the model has.
What you save is your choice, not a measurement. Models measured here individually don't offer Tune.
Shape
The shape row under the model chips offers square, 4:3, 3:4, 3:2, 2:3, 16:9 and 9:16. The shape carries through everything made from the image, so a portrait stays a portrait.
A non-square image costs no more time than a square one, because it uses the same number of pixels. Some models render finals in wide shapes a little smaller than their square size, because larger than that they start drawing the subject twice.
Upscale
Upscale enlarges the image and then repaints it lightly, adding real detail while keeping the picture the same. Choose 2K, 3K or 4K; the picker only shows sizes larger than the image and supported by the chosen model.
The image is upscaled by the model that made it, which keeps its look. You can pick a different model, but that changes the style.
Any finished image can be upscaled, including edits and earlier upscales. Drafts can't: use Finalize or Faithful first.
Upscale needs an upscaler installed in Draw Things (4x UltraSharp, see Setup). Without one the button is disabled.
2x fast is different: it sharpens the pixels that are already there and adds nothing new. It takes seconds and works even when Draw Things is closed. Use Upscale for new detail, 2x fast for the same picture, bigger.
Edit before you upscale. An edit without a rectangle comes back at the model's working size (about 1024px), so editing a 4K image gives you a smaller one. The dialog warns you. There are workarounds if you need them.
Edit: changing a picture
One dialog handles all edits. What it does depends on whether you draw a rectangle and what you ask for.
With a rectangle: change what's there
Drag a rectangle around the thing to change (a cat, a dress, a face) and
describe the change the way you'd write a prompt: black cat, not make the
cat black. Everything outside the rectangle stays exactly as it was, at full
resolution. It takes about 30 seconds and can swap objects as well as recolour
them.
Keep the rectangle under about 400px on its longest side for full detail; larger ones come back a little softer.
strength sets how far the rectangle may move from what is there: 0.7 (the default) changes it, 0.8 replaces it entirely, 0.65 changes it only partly.
Reference image… is for when words don't get you the thing you want. Pick another picture, drag a rectangle around the part to use, and its pixels are pasted into your rectangle and repainted to blend in. The strength drops to 0.55 so the pasted pixels survive.
With a rectangle: add something new
Choose add something new to place a new object, like a dog on the grass or a bird on a branch. The instruction editor draws it into your rectangle, matching the picture's lighting.
The rectangle is everything the editor can see, so draw it around all the space the new thing needs, including its head, feet and shadow. If you ask for a standing dog in a thin strip, its head will be cut off. Nothing outside the rectangle changes. This takes about a minute and a half.
Without a rectangle: edit by instruction
Write an instruction and the whole picture is re-rendered with that change. Anything you don't mention stays the same. To get good results:
- Give an instruction, not a description. "Change her dress to red" works; "a woman in a red dress in a cafe" makes the model redraw the whole scene.
- Make it clear which thing you mean: "the mug on the left", "the taller bottle".
- Say what the result should look like: "deep burgundy velvet", not "nicer". Don't use negatives: write "remove the sunglasses", not "without sunglasses".
With the Lightning LoRA on, colour changes work well, and an addition can look slightly pasted on. Replacing one thing with another can leave the old one showing. For a replacement, untick Lightning in the ⚙ dialog (about five minutes instead of 1.5), or do it in two edits: remove the old thing, then add the new one.
Without a rectangle: another take on it
Not really an edit: the image is redrawn from its own prompt plus your change, keeping the same layout, framing and pose. Use it when you like a composition and want another version of it.
Improve with LLM
Rewrites your text in the form the chosen route works best with. It never starts a render: you see the rewrite, can edit it, and press Apply. For instructions, pick a vision model such as qwen3-vl:8b so it can see which object you mean.
The other controls
- with picks the model. Change what's there and another take on it can use any installed model, not only the one that made the picture: an anime model for a character in a photo, say. Instructions and additions always go to Qwen Edit.
- steps starts at the chosen model's own count. Too few leaves the edited area soft and washed out. Qwen Edit needs 4 with Lightning and gains nothing from more; without it, about 8 for a colour change, 16 to replace something and 24 or more to add something.
More on what edits can and can't do: Deep dive.
Combine: two pictures into one
Takes the subject of one picture (a person, a cat, a car) and puts it into the scene of another, redrawn to match the scene's light and perspective.
Pick two pictures with the ⧉ button on their cards, then press Combine… above the grid. The first one you picked is the subject, the second is the scene; ⇄ swaps them. Then describe what you want:
- Say which thing to take: "the girl with the emerald hair", "the black cat".
- Say where it goes: "on the steps", "at the café table on the right".
- Describe any new pose in its own sentence. The subject keeps its original pose unless told otherwise, so someone sitting on a sofa ends up sitting on nothing. Write "Change her pose: she stands upright." or "Change her pose: she sits on the bench."
The result is a new picture of the scene at just under 1 megapixel, so Upscale it if you like it. It takes about two minutes and needs the Qwen Edit model.
The subject is redrawn, not copied, so small details can change. Mention anything that must stay: "keep her closed eyes and the cat on her shoulder".
Animate
Turns a still into a short clip. The still is the first frame. Two video models are offered, and MiniMax H3 is the default and the recommendation:
| model | clip lengths | a 2-second clip | a 5-second clip | pose changes |
|---|---|---|---|---|
| MiniMax H3 + Turbo | 1 to 8 s at 24 fps | about 6 min | about 14 min | yes |
| Wan 2.1 FusionX | 1 to 5 s at 16 fps | about 12 min | about 30 min | no |
H3 is about twice as fast, and it can change a pose: asked to stand up from a sofa, a seated figure does. Its motion is also livelier, since the same "gentle breeze" that stirs the hair on FusionX lifts a hem on H3, so ask for less than you want. It renders a soundtrack too, which plays when you press play on the clip's card; the review pane starts muted. The sound needs Draw Things on the same Mac (why).
H3 runs with its Turbo LoRA, and is hidden until that is installed (setup). The LoRA brings a clip down from the model's usual 50 steps to 8, which makes it about four times faster for the same quality.
| you want | FusionX | MiniMax H3 |
|---|---|---|
| a camera move: push in, pan | works reliably | not yet tried |
| ambient motion: wind in hair or cloth, moving light | works | works, and stronger |
| a pose change: standing up, a big arm movement | doesn't work | worked when tried: a seated figure stood up |
Tips:
- Don't mention the camera unless you want it to move. Even "the camera stays still" makes it move.
- The pose in the still matters, on FusionX above all. Someone caught mid-stride will walk. For a specific action on FusionX, start from a still that already suggests it; for a pose change, use MiniMax H3.
- Ask for one kind of motion at a time. Several at once in two seconds all come out weak.
For Improve with LLM, use qwen3-vl:8b, which describes what is actually in the picture most accurately.
Videos are always rendered at about 832×480 (FusionX) or 832×512 (H3), so there's no point upscaling a still before animating it.
Prompt length
Long prompts aren't cut off, but the longer a prompt gets, the more weakly the model follows all of it. Your subject comes out smaller and less distinct, and background details take over.
| model | fully used up to (characters) | ignored after |
|---|---|---|
| Juggernaut XL Ragnarok | 600 | 900 |
| FLUX.2 klein 9B | 450 | 900 |
| FLUX.3 klein 5.6B | 400 | 800 |
| Qwen Image 2512 | 400 | 800 |
| Krea 2 Turbo | 350 | 700 |
| Z-Image Turbo | 260 | 800 |
| FLUX.1 schnell | 240 | 600 |
| Illustrious and Anima models | 240 | 600, between 450 and 700 on a checkpoint measured for the app |
Between the two numbers, the end of the prompt has less and less effect.
Put what matters first: subject and action, then appearance, then setting, then lighting and style. If a prompt is too long, cut from the end. The LLM writes to each model's limit, and the composer warns you when your own prompt is too long. With several models selected, prompts are written to the shortest limit.
Prompting the anime models
The anime models, Illustrious and Anima, were trained on images labelled with Danbooru tags, so they understand Danbooru's words best. Prompts are still written as sentences, because sentences can say who has what and where things are. A list of tags can't.
So the app writes sentences using Danbooru's words: "twin braids" rather than "two plaits", "from above" rather than "high angle". Where Danbooru has no word, plain English is fine.
The app includes a copy of Danbooru's tag list and uses it three ways:
- LLM-written prompts get their spelling corrected to the form the model
knows, for example "mini skirt" to
miniskirt. Nothing else is changed. - The composer checks your prompt and suggests fixes you can click: words
that make images worse, better spellings, and tags that mean what you wrote
(
daytime→day). It only suggests; nothing changes until you click. - Autocomplete in the prompt boxes, ordered by how common each tag is.
Avoid "detail" words like "intricate details", "concept art" or "8k". They come from other kinds of models. Anime models don't know them and produce a hazy, washed-out look instead. The composer flags them.
More detail: the tag vocabulary.
Negative prompts
The one-line box under the prompt is for things you want kept out of the picture. It only appears when a selected model can use one: models running at CFG 1 can't.
These models use negative prompts: Juggernaut XL, Qwen Image, and the Illustrious, Anima and SDXL models, except the few measured checkpoints that run at CFG 1. These don't: FLUX.3 klein, FLUX.2 klein, FLUX.1 schnell, Z-Image Turbo and Krea 2 Turbo, nor any model while its speed LoRA is on.
If you leave it empty, a sensible default is used. Anything you type replaces the default rather than adding to it, so include things like "bad hands, watermark, lowres" yourself if you still want them.
After Enrich, each prompt variant gets its own negative prompt next to it.
Variation
The variation menu next to Enrich decides how different the LLM's prompts are:
- explore (default): each prompt tries a different composition, so you get genuinely different pictures of the same idea.
- hold composition: keeps the framing you described and varies only the details. Chosen automatically after From image….
Your own prompt can go too, to every selected model. The orig line under the prompt box says whether it will: after Enrich it is in unless this session has already drafted that exact text, and its × or + add changes that. Each written prompt has an × to drop it. The count beside Generate lists what it will send, e.g. "3 prompts (orig, V1, V3)".
Each image is labelled with its prompt: orig for yours, V1, V2 and so on for the LLM's. Numbers keep counting up across the session, so a second Enrich continues at V4.
Choosing the prompt-writing LLM
The dropdown in the page picks which Ollama model writes prompts. gemma3 (the default) is more creative and adds more; qwen3-vl stays closer to what you typed. You can switch at any time.
Any Ollama model you've installed appears there. Text-only models work for Enrich, but anything that looks at an image (From image…, Finalize+, Improve with LLM, and Publish's from image buttons) needs a vision model. The dropdown marks which is which.
If the LLM fails, you get a message with the reason and a Retry button. What the reasons mean.
Browsing and comparing
Each image shows its size in the corner (768px, 1.5K, 2K, 4K), in green from 2K up.
The show row above the grid filters what you see: click drafts, finals, a model or a size. Click again to undo. The ⤵ button on a card shows only that image's family: where it came from and everything made from it. Filtering only hides images; nothing is deleted.
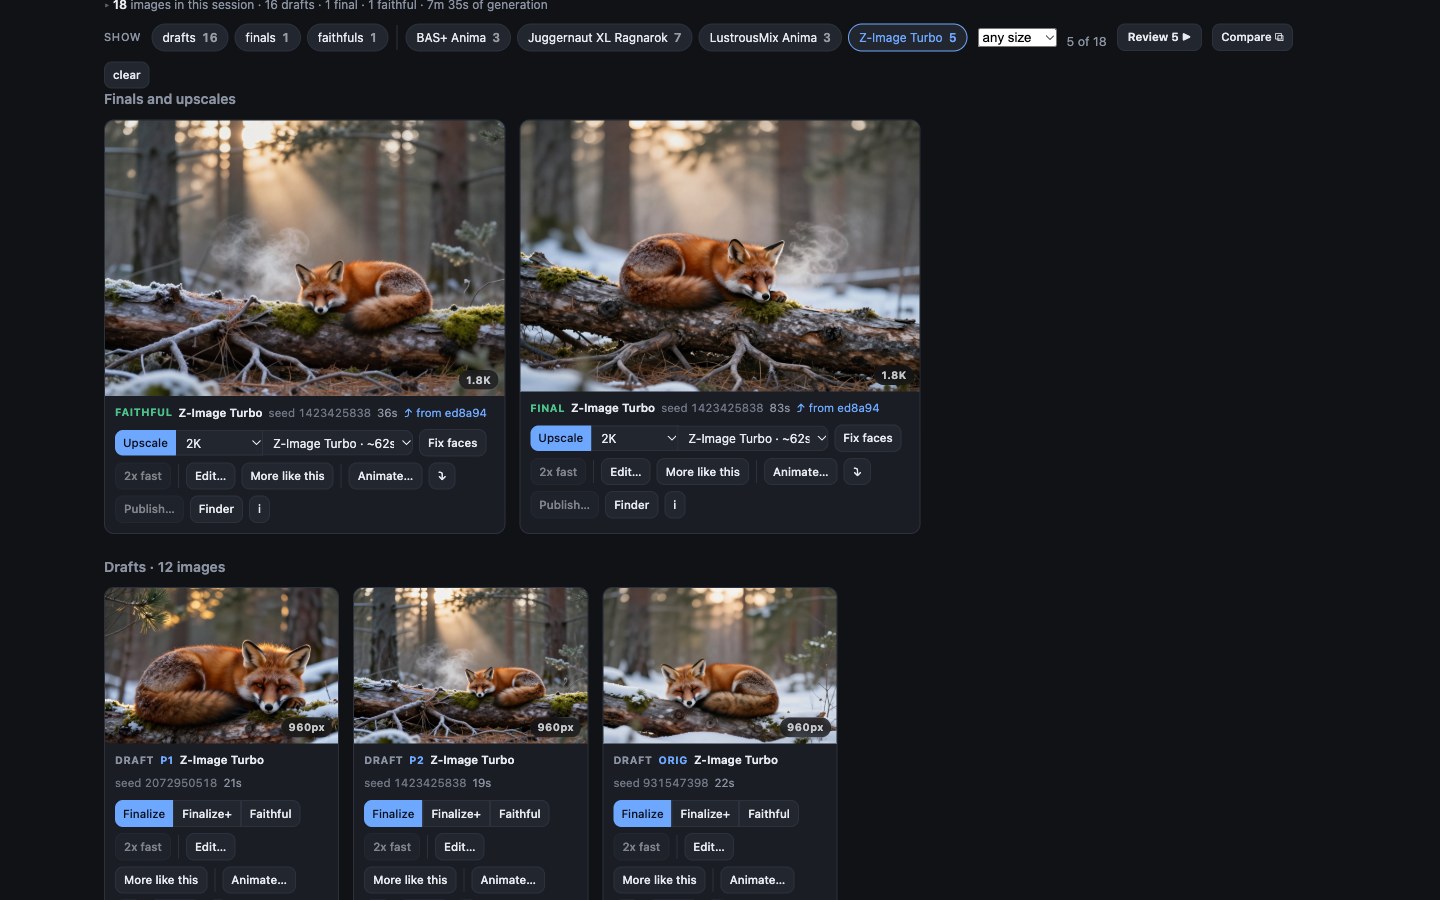
Review ▶ steps through the images on screen one at a time, each at its real size.
- → or Space for next, ← or Backspace for previous, Esc to leave. Clicking the picture also moves forward.
- Clicking an image in the grid starts the review from there.
- When you leave, you're taken to the card you stopped on, ready to act on it.
Compare
Compare ⧉ shows up to ten images side by side, zoomed and panned together, so you can see exactly what changed between them.
Pick images with the ⧉ button in a card's top-left corner, then press Compare ⧉. Picks stay while you scroll, filter and close the comparison. unpick clears them. With nothing picked, Compare opens the two most recent similar images the current filter shows, so a quick way in is ⤵ on an image and then Compare ⧉.
- Drag to pan all panes together; scroll to zoom.
- 1:1 shows real pixels. match scales images to the same framing. fit shows each whole image.
- Keys: 1, m, f, + and -, and Esc to leave.
- show card ⤴ on a pane closes the comparison and takes you to that image. ✕ removes a pane without deleting the image.
Publish to Civitai
Publish… uploads the image to civitai.com as a post. The seed, steps, CFG, sampler, size and the models used are included, so Civitai shows the generation details. Your own file isn't changed.
You need a Civitai API key: set CIVITAI_TOKEN in .env, or put it in a
civitai.key file next to it. Get one at civitai.com → Account settings → API
Keys.
There are two kinds of post:
- Simple post (default): a title, description and tags, with no prompt.
- With prompt: also includes the prompt and negative prompt, which you can edit first. Editing them changes only the post, not the image or the saved prompt.
Every field is optional.
Write from image has the vision LLM look at the picture and write a title, description and tags. Check them before posting, as small details can be wrong. The description ends with "Rendered locally in Draw Things."; remove it if you prefer. Undo restores what was there.
Read from image (in With prompt) writes a new prompt from what the picture actually shows. Useful when the render didn't match what the prompt asked for.
The post is always created as a private draft. The dialog links to it on Civitai, where you set the content rating and publish it. The card also gets a ↗ published link.
The generation settings can't be edited. For an upscale or a face fix, the settings shown are those of the image it was made from. Drafts and videos can't be published. Civitai limits uploads to 10MB, so a 4K PNG may be rejected; publish the smaller version instead.
Odds and ends
- ✎ next to the session picker renames the session.
- Finder on a card shows the image file in Finder.
- ✕ on a card deletes the image file too.
- Storage, at the bottom of the ⚙ dialog, shows where images are kept and how much space they use. Check storage finds broken cards and stray files. It lists everything first and only deletes when you press Remove them.
- Remove drafts clears the open session's drafts once you've picked the ones you want. A draft that something else was made from keeps its details (but not its image), so you can still trace where your finished images came from. It also lists everything before deleting.
- If Draw Things closes or stops responding, jobs wait and continue when it comes back. More on this.
- CFG, sampler, image sizes and LoRAs are set in
config/models.yaml.